


#3DVFaceShield
This is the guide on how to choose your print settings and print the protective visors / face shields. For best quality we strongly recommend that you follow these settings.
The settings described below is described with the terminology used in Ultimaker Cura,
but they should be possible to enter in any slicer on the market that allows you to change settings.
Quality-checking
Make sure that: - layers adhere properly to each other - walls are completely fused together - surfaces are smooth without gaps - the print has decent flexibility
What filament should i use?
So far, all the most common rigid plastics used in Filament based 3D Printing has shown promise to work well.
If you are buying filament especially for this project, go with PETG or another Co-Polyester, these have better temperature resistance and a slightly better tolerance to some chemicals, but if PLA is all you got, go with it!
The filaments you should NOT be using is:
- Anything flexible, TPU, TPC or similar.
- Anything deliberatly porous, like Polymatte or Colorfabb LW-PLA
- Wood or other natural fiber filled polymers, these can absorb fluids.
- PVB, PVA or BVOH, anything that is easily souluble in either alcohol or water, PolySmooth is not a suitable filament for using to make these since it will dissolve in the desinfection the hospital will use.
- PMMA, since it has very low resistance to alcohols.
We have not evaluated usin resin printers to print face shield frames.
SETTINGS
What Infill percentage should i use?
This model is made to print with no infill at all. But it is also made to be printed fully solid.
This means that you can set your infill percentage to 0%, as long as you follow the suggested line width and wall number settings below. This will make your print the strongest and fastest to print.
It is important that the print has as few voids as possible, since this will increase the drying time every time it is dipped in disenfectant solution and make it harder to clean.
What NOZZLE SIZE / LINE WITH should i use?
Since one of the key things in this project is to get the production volume high, if you have the possibility, we suggest you to use a larger than standard nozzle and a larger layer height than you may be used to.
The parts are fully printable with nozzles up to 1.2mm if you choose proper settings, and if you have a high-flow hotend like the Mosquito Magnum or the E3D Supervolcano you should try to use these to your advantage.
What you have to do is to set all your line widths to a multiple of approximately 4mm.
Be aware that Cura hides quite a few of the settings as deafult, so turn the setting visibility to "expert"
Set your number of walls to be equal to ~2.5mm, so with 0.8mm line width you should have at least 3 walls thickness, with 0.4mm it should be at least 5, and with 1.33mm line width only 2 walls is needed.
This means that the optimal line width is:
- 0.4mm nozzle -> Set line width to 0.5mm
- 0.6mm nozzle -> Set line width to 0.66 or 0.8mm
- 0.8 mm nozzle -> Set line width to 0.8mm or 1.0mm
- 1.0mm nozzle -> Set line width to 1.0mm
- 1.2mm nozzle -> Set line width to 1.33mm
What Layer height should i use?
The design is very compatible with thick layers with no negative effects, so the answer is "as thick as possible".
The main limiting factor will be your nozzle size, since the layers need a fair bit of compression, by default it limits you to about 2/3rds or 66% of your nozzle size in mm as layer thickness.
You do need to keep your layer height at 0.6mm or below, or the thin drip protection area above the eyes will fail to print.
The layer heights we suggest to use are:
- 0.4mm: 0.25mm (standard hotend)
- 0.6mm: 0.3mm (standard hotend)
- 0.8mm: 0.3mm (standard hotend)
- 0.8mm: 0.5mm (high-flow hotend)
- 1.0mm: 0.6mm (high-flow hotend)
- 1.2mm: 0.6mm (high-flow hotend)

What Print speed should i use?
Since this design has no real overhangs and little need for cooling, the main limiting factor for how fast you can push out these frames will be your hotend flow rate.
The hotend flow rate is the number that determines how much plastic your printer can melt in a certain amount of time.
If you just want to start printing:
Start with our suggested layer thickness and line width for the nozzle you are using, and a print speed of at 40mm/sec. This should work on almost any printer.
Make sure to set all the different print speed settings to the same number, this design caters very well to this.
Ultimaker Cura has quite a few "hidden" print speed settings, but if you turn on "expert" mode you can set all of them.
The only one that should be lower is the "initial layer print speed", since it important for bed adhesion. A good starting value is about 20mm/sec.
If you are a advanced user and want to speed up production:
For a regular E3D V6 this is about 10mm3/sec, wich with a 0.8mm nozzle and 0.3mm layer height is calculated as: 10mm^3/(0.8mm*0.3mm) = ~40mm/sec,
A high-flow hotend like the Mosquito magnum with a 0.8mm nozzle and a 1.0mm line width can on the other hand push more than 30mm3/sec, or 30mm^3/(1.0mm*0.5mm)= ~60mm/sec
A super high flow hotend like the E3D Supervolcano can melt up to 100mm3/sec, and with a 1.2mm nozzle and 1.33mm line width it can push 100mm3^3/(1.33mm*0.6mm) = ~125mm/sec
In practice, it might be hard to reach these numbers for other reasons, and if you see signs of your printer underextruding or wanting to grind, start by lowering your print speed by 5mm/sec and increasing your print temperature by 5 degrees.
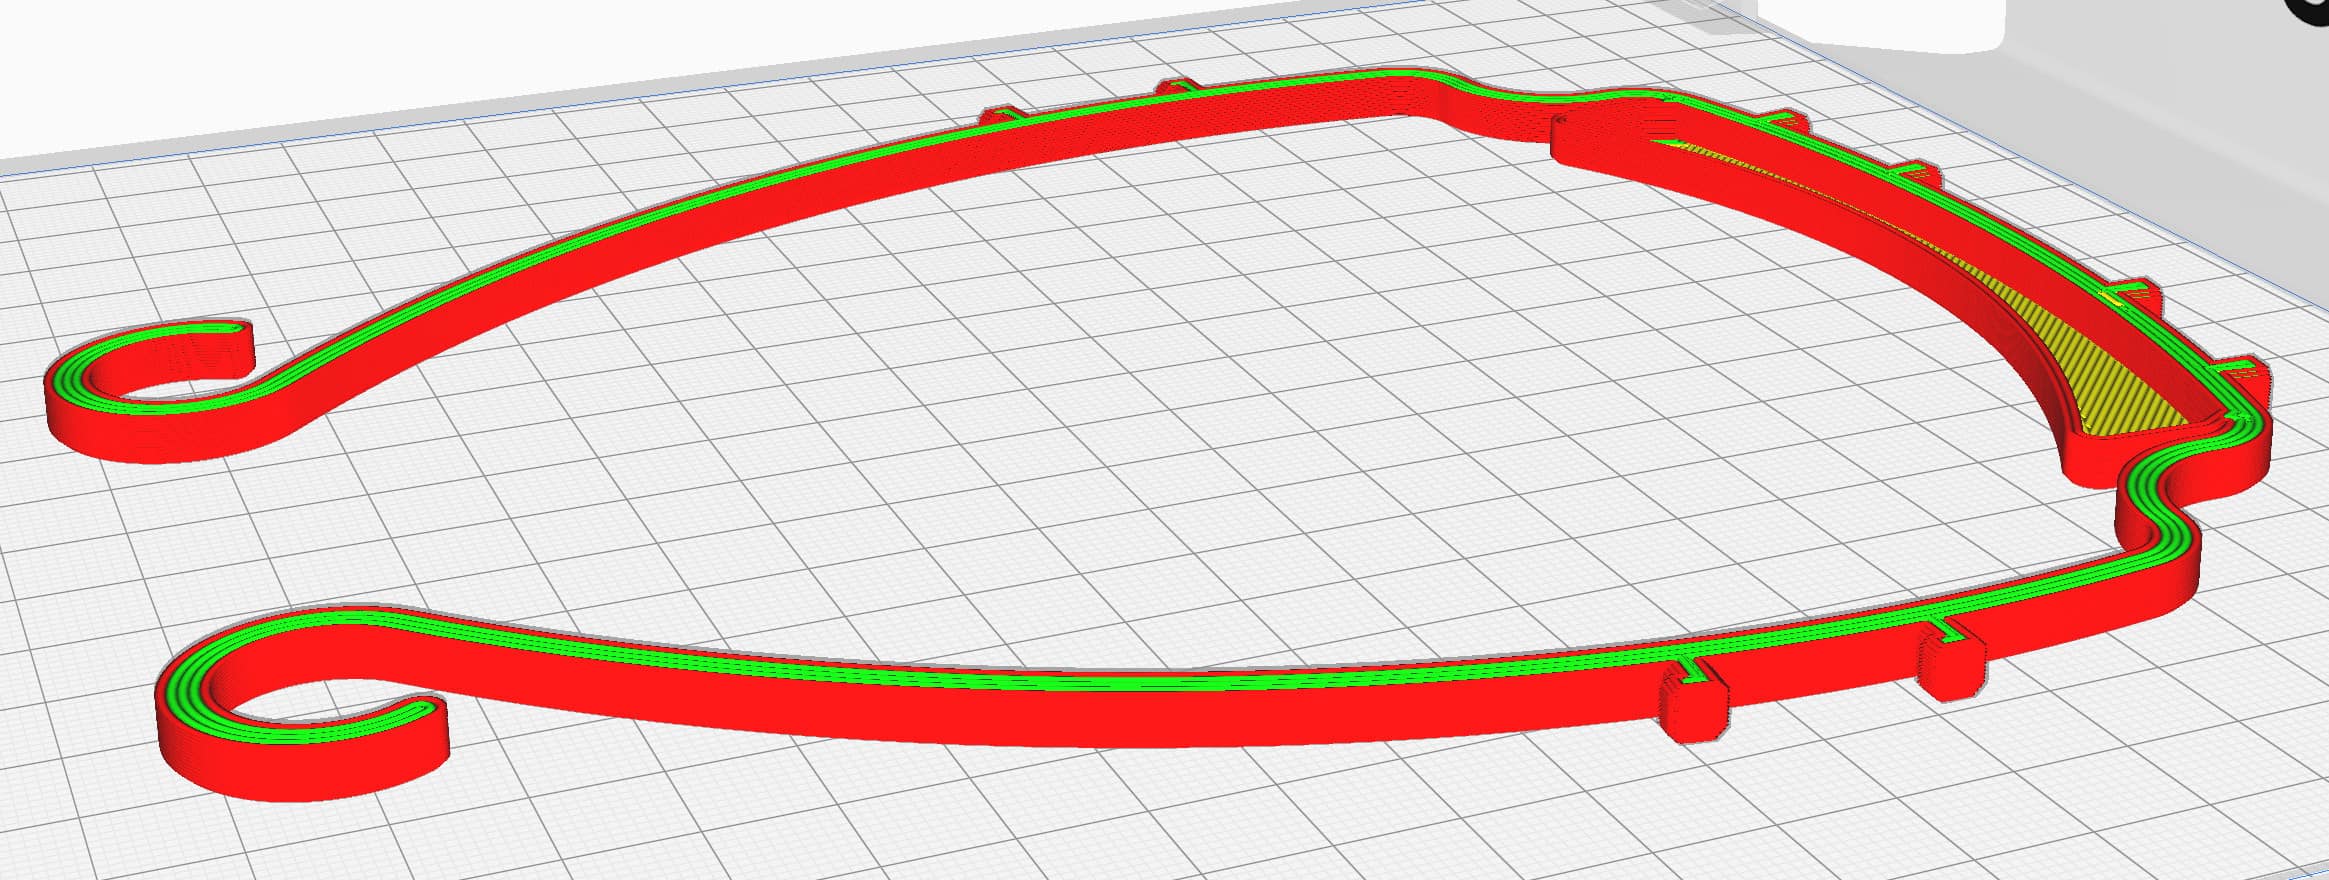
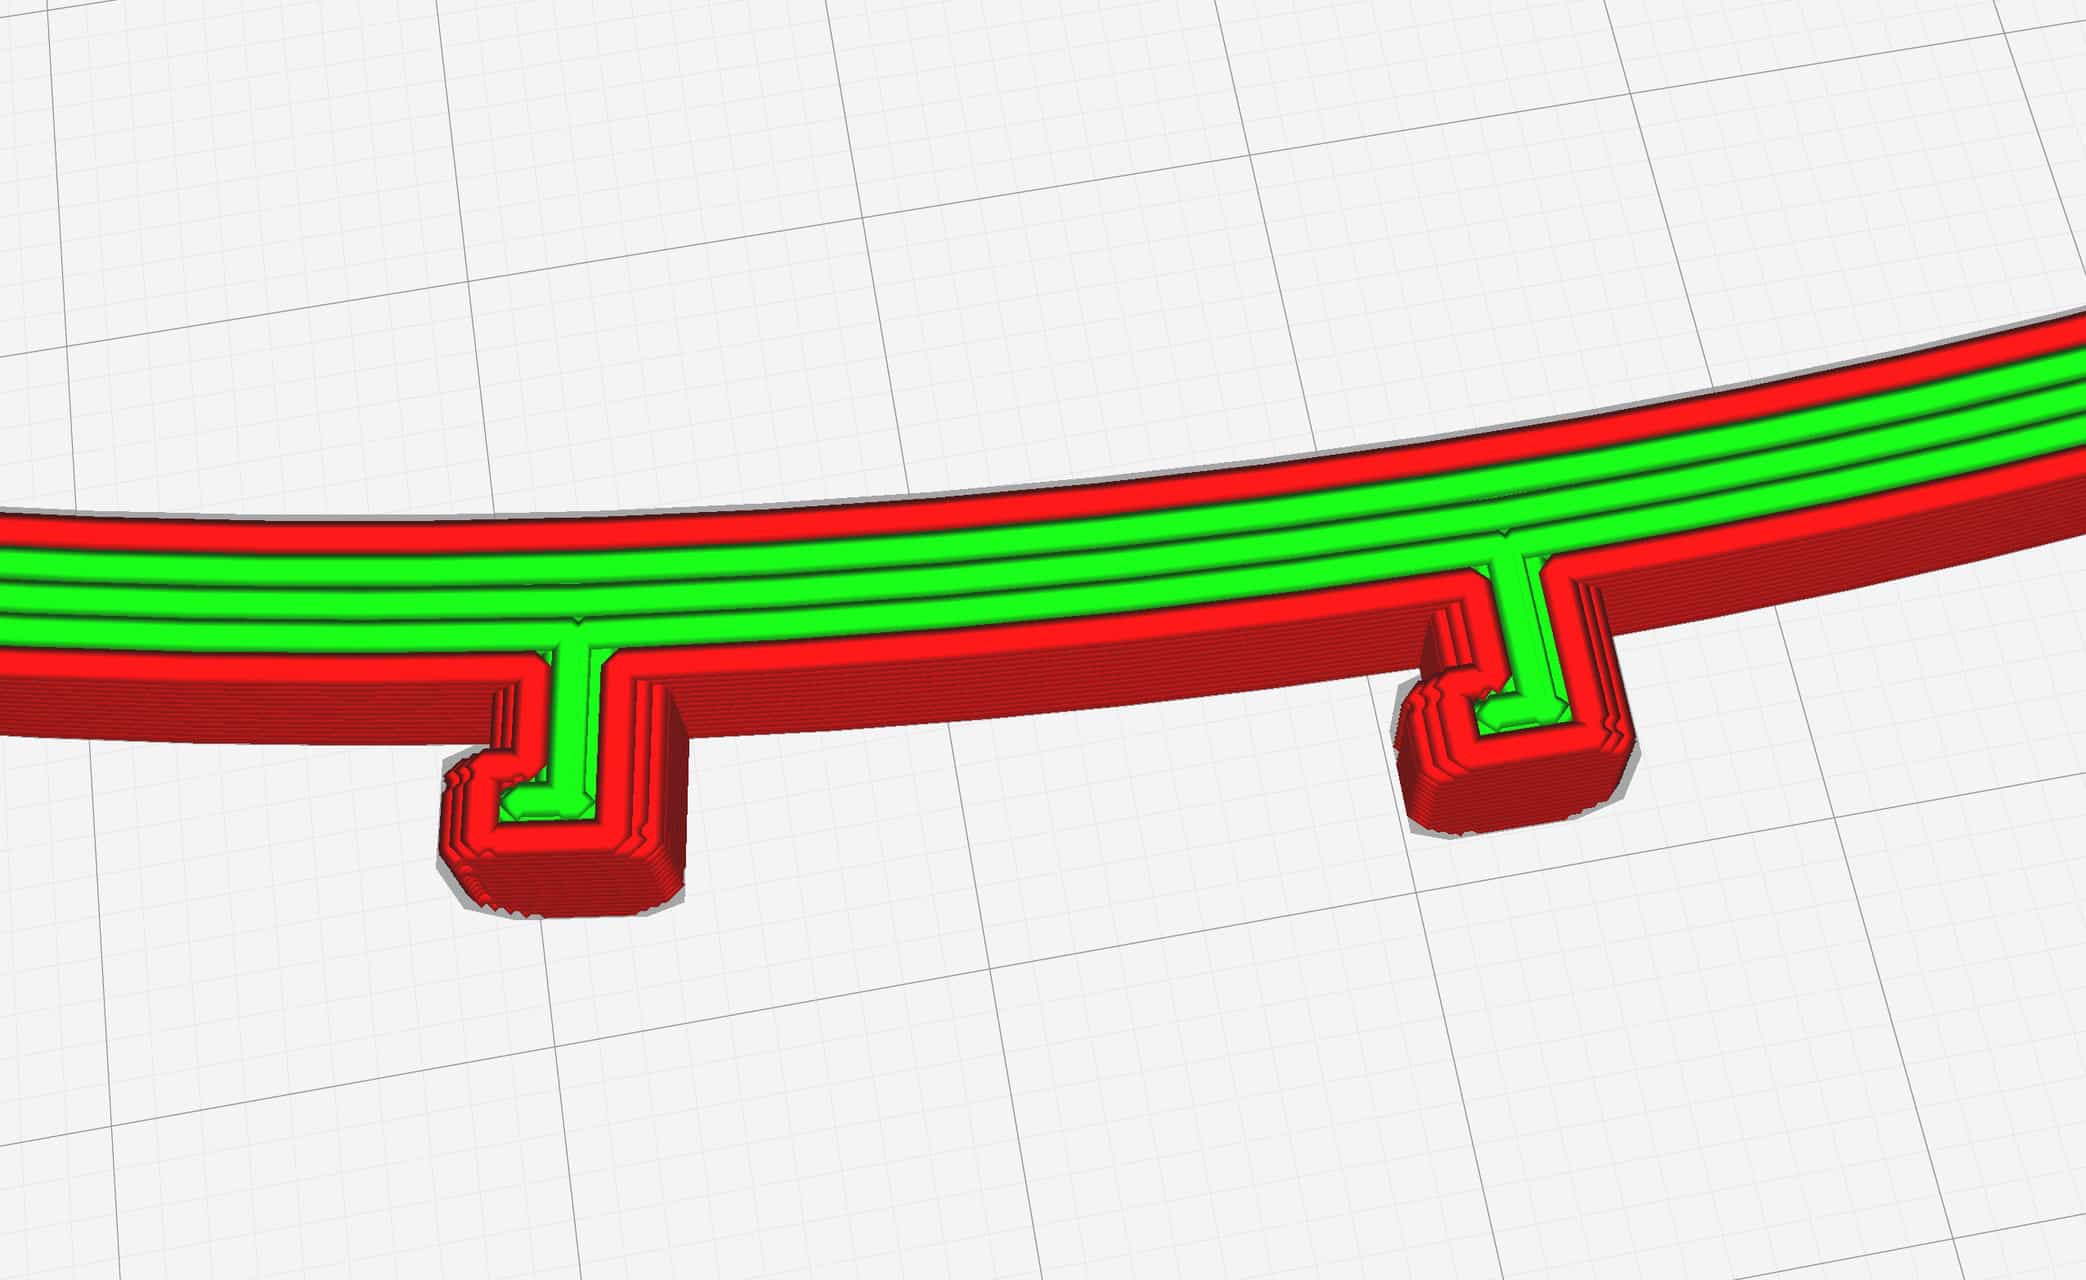
What should i look for in the layer preview?
You know that you have a good sliced file when you look at the layer preview and the following is true:
- All lines follows the shape, no zig-zag patterns except on the thin surface in the front.
- No weird break-ups in the lines where it looks like multiple short lines make up a longer one with small spaces in between
- All lines seem to be touching each other, no large spaces in between them.
And now what?
Continue to read our articles about the rest of the process:
Choosing the correct version to print & how to punch the holes